Camper Van Project

Read through my latest blog posts and feel free to comment on them if you like.


Filter:

Latest Posts


IN THE SUMMER TIME.


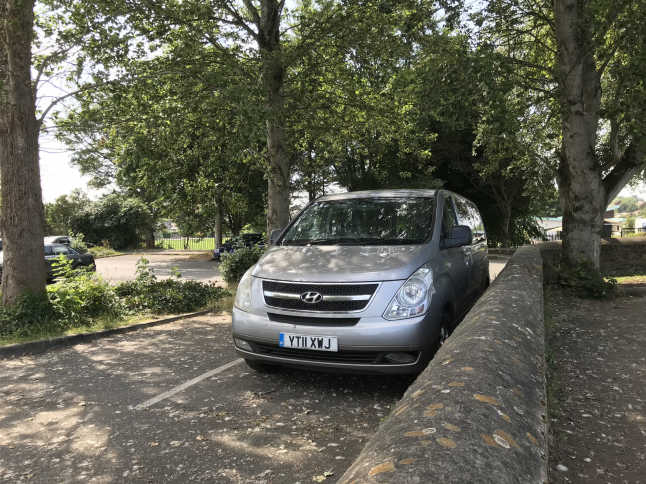
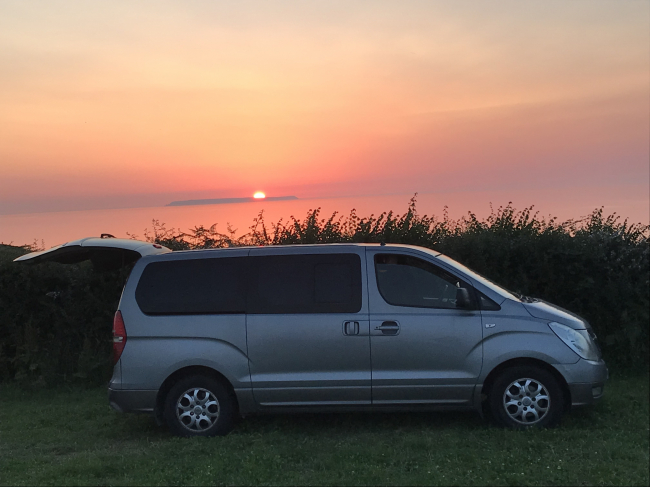
I have had to stop playing with the Hyundai i800 Camper Van Project in order to fix a leaking roof. We had waited out the winter to make a start on the work in April this year.


It took until June to finish the roof. This then lead to cleaning the fascias and gutters to take advantage of the scaffolding being there for the roof. As the work is being done buy "the owners" the single major cost is the scaffolding. It therfore makes economic sense to repair or refurbish anything else that we have access to including the walls and windows.


The building has been neglected for a good many years as evidenced by the dodgy repairs we uncovered while fixing leaking roof. It's easy to ignore the structure of a building until something goes wrong with it. At which point it becames up front and personal. The signs of neglect become more obvious and the need for some cost effective repairs more urgent while we have the scaffolding in place.


That repair work is still ongoing but I've torn a muscle or worse in my shoulder. ( I've been told it's a rotator cuff tear in my right side. ) Taking a short break while it heals is therefore recomended. The injury was likely caused by too much heavy lump hammer work chasing out cracks in the walls in July.


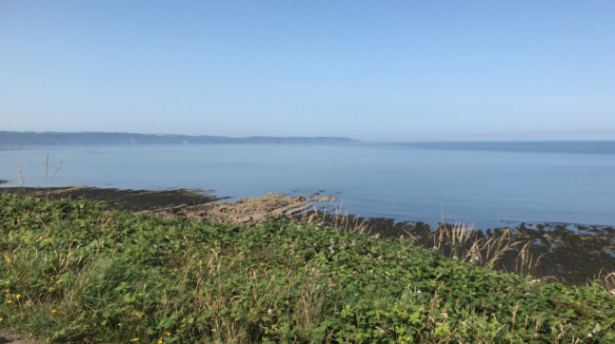
I decided to take one of my sons camping to do a bit of surfing and walking for a week and booked a pitch in North Devon near Westward Ho. Only then did I remember that I'd knackered the old van battery I'd previously used to run the chiller box last year.


A replacement had been foreseen but not actioned. The same followed for a new potty / toilet facility acquired late the previous year but still in its box. Plans have been made and mocked up for a utility pod that these would be placed within but I now didn't have time to make it.


Yet another, "good enough for now" solution needed to be made for both in less than a week including buying the parts. A 12V 110 Ah deep cycle leisure battery was bought from Tyna Batteries direct online and a Split Charge Relay Kit including the voltage relay switch, 50 amp fuse holders and fuses, wire, clips and cable terminals from Amazon together with some terminal boxes and chunky connectors.


Getting the cable from the main stater battery to where I wanted the leisure battery to sit took a bit of exploration and thought before opting for the simplest, most direct route. I runs from behind the drivers seat below the body of the van, clipped over the air conditioning pipes, to terminate in the engine bay via a 50 amp fuse fitted to the lid of the existing fuse box.


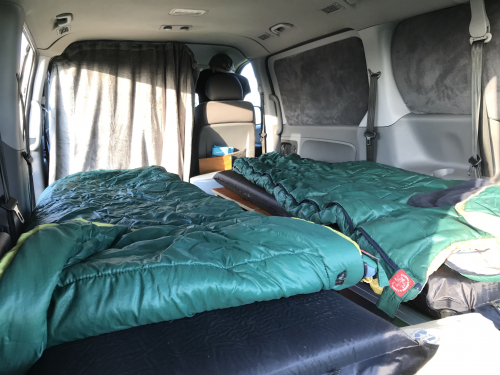
I still didn't know how I was going to fix the new battery in place as I had no time to build the pod I had planned. The easiest thing would be to place it in an off the shelf box that I could fix to the floor but also fix the split charge relay, fuse together with a block of 3X12V car sockets with 2X USB points I already had from my old camping kit.


Once the basic supply wiring was finished I popped into my local "all things cheap" store and bought a black plastic box I felt I could adapt to suit me needs.


Dimensionally it was fairly close and too tight a fit but I knew I could stretch it by applying strategic heat. The new HOT gas cooker bought back in January / February proved to be ideal. So good that I managed to melt part of the top of the box in my haste to get the job finished.


It was Sunday with arrangements made to leave late on Monday and I still hadn't worked out how I was going to store / secure the new loo.


I didn't have time to film the making of the loo box. It was a simple task that followed on from the one I made last year using an old Ikea laundry basket. We bought two of these around 20 years ago and they make an ideal short term solution with very little modification.


The new loo is so much more compact than our very cheap Argos bucket-like one of the previous year. The difference height allowed me to (Monday morning quickly) fix a couple of battens above the loo on either side inside the Ikea lattice cube to support an internal shelf made from an off-cut of thinnish chipboard I had lying around.


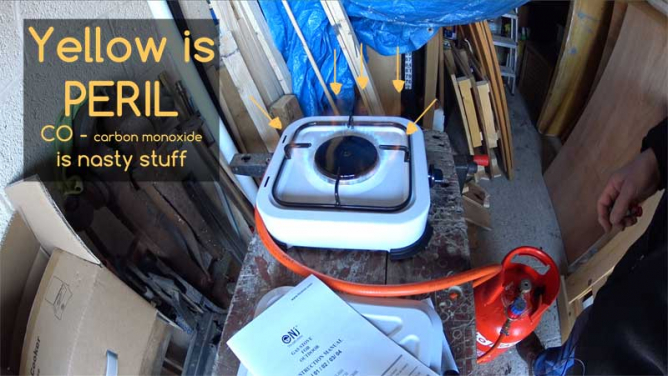
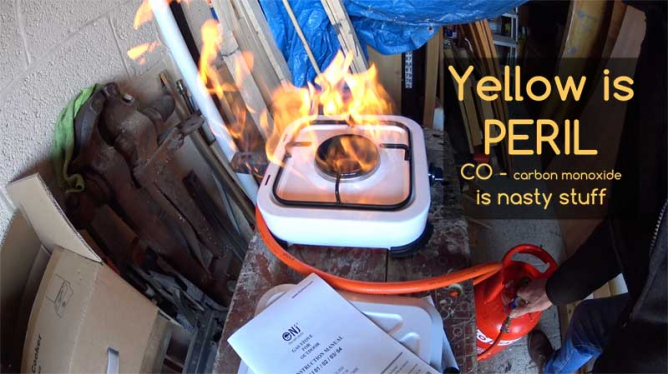
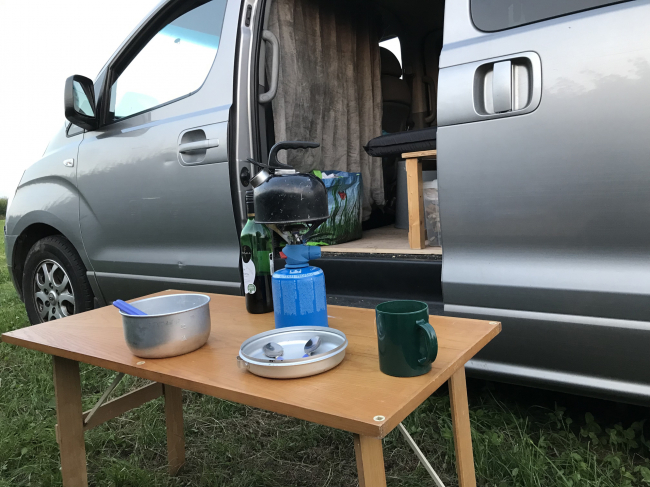
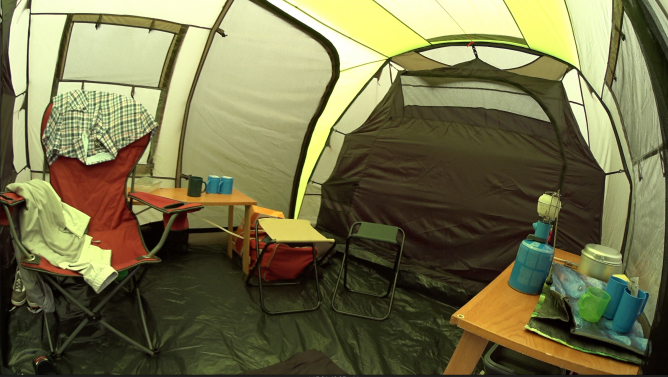
This shelf allowed me to store some bits and pieces such as the very small gas cooker, a camping kettle and spare gas canisters. We were therefore able to make a cup of tea inside the van as originally envisioned. The only difference being that I placed the cooker on the floor with a side door open.  That proved to have been prudent decision as after a few days, the gas connection at the canister started to leak and caught fire.


Having the door open behind me allowed me to launch the whole assembly out into the car park where the canister separated from the burner on impact, instantly extinguishing the flame. I did sustain a small but deep burn when I picked the burner up to chuck it out.


Those pan supports get red hot. OUCH!


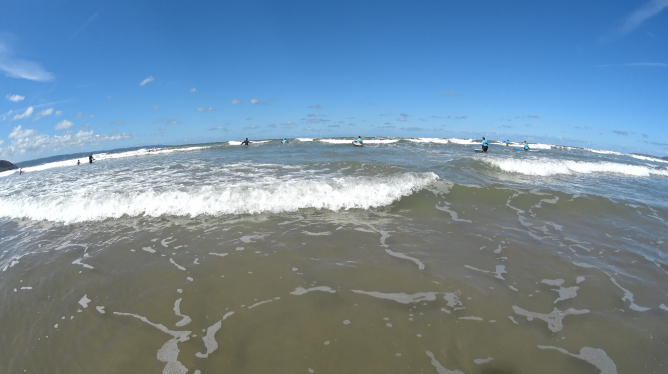
This trip was so unplanned I simply threw everything I though we might use in the back of the van without much thought about it. I took all of my fishing rods, reels and gear that ended up just getting in the way as all we did was get in the surf or walk.


Even the new tent was a test. We had trashed our previous one a year before we acquired "the van" after a "challenging wet trip" that saw our old one develop more rips and tears.


The new one was bought from Aldi for not a lot in their end of season sale that same year. So it has been stuck in a box until we arrived at Westacotte Farm near Bideford on Monday evening as it was beginning to get dark. The tent only has three "poles" so went up fairly quickly. It's an interesting design with features clearly included to cater for users not familiar with living under canvas.


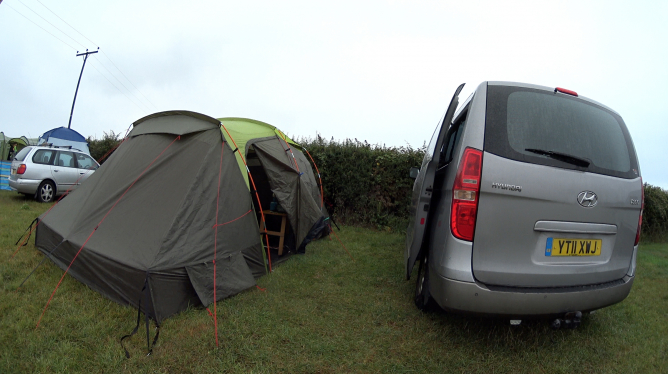
For example, rather than expect the inexperienced to know that EVERYTHING needs to be kept well away from the sides inside the tent. Each of the tents tapering ends includes a vertical skirt using two short integral poles. The side skirts these support have a large ventilation flap allowing abundant ( LOTS OF ) fresh air to circulate through the tent via the VERY LARGE air vent in the roof. This mesh covered roof vent is almost half the size of the total arching roof space and is overlapped with the true roof offset above it by around 50 or 60mm.


The effect is to have a tent which tends to flap loudly in a wind but which is so well ventilated that there was little or no sign of the usual condensation one gets on most polyester or nylon fabric tents. I suspect that a tent with no condensation is clearly likely to get fewer "it leaks" complaints than one without this feature.


I just thought it made the tent particularly noisy but it beats getting up in the night to embrace the elements while checking the tension in ones guy lines / guy ropes of a cotton canvas tent. Breathable though they may be.


The Aldi four man tent we used was certainly big enough for two of us though it might be a tad too cosy with four if your planning on living in it for some weeks.


The short little skirt support poles dictate that the tent needs to be folded in a manner which take account of these and the potential for them to rest a 90 degrees to how you want to roll the thing up to place in the carry bag at the end of your trip.


I got it wrong when we hurriedly decamped on our last day. I simply threw the whole thing into the back of the van in frustration and sorted it out after we got home.


The trip, though short, also highlighted the need to find a way of fitting a pure sine wave "resource" for charging modern sensitive digital equipment while the engine is running. I have an old 300 Watt inverter which I used to run and charge my laptop from but it only worked when running off the leisure battery with the engine not running.It did the same with a lithium storage brick I recharged the same way.


I suspect that I need a pure sine wave inverter to solve that problem but it needs more research.


The final lesson from the trip was to NOT completely fill the water reservoir in the portable loo. We don't intend using it for anything other than bladder emergencies. This negates the need to hold a full store of 15 litres of flushing water that slops about and sometimes leaks when travelling.


Thanks for your support.


Sam


I sent the previous single burner gas stove back to Amazon as I deemed it unsuitable for use in an enclosed space. The gas flow mechanism was too crude with little adjustment as evidenced in the previous video shot when I tested it.


I did a god deal of searching before finally opting to buy another stove from the same manufacturer.


That decision was strongly influenced by the fact that the Amazon channel owner had posted a video attached to the photographs with the product description.


I was impressed but concerned that the stove might have to high an output for the use I have in mind, making cups of tea inside the van when it is raining or windy outside.


The stove I've tested in this video has a 4Kw output rather than the 2Kw ( roughly ) of the first stove I tried.


BUT.


The one shown here has two burner rings ( a small and a large ) one inside the other. Their combined heat output is 4Kw but it can be run on the small ring only at its lowest setting. My estimate is that the small ring has an output of around 1Kw. The large burner ring being around 3Kw.


Unlike the first gas stove, this one also has Piezo ignition when the gas is first turned on. It worked a treat and is a big step up from trying to light the gas with a match or lighter. This second stove also has separate adjusters that control the gas air mix which can be reached from below the cooker, even when it is lit.


This feature is fantastic as it allows one to maintain the perfect flame colour for optimum fuel burn at any time. This ultimately makes the stove safer and more efficient than those without the feature.


My conclusion is that this is a fantastic little single burner gas stove that should suit my needs perfectly.


The fact that it cost LESS THAN £40 DELIVERED is AMAZING!!!

Budget Cost Single Burner LPG Gas Stove TEST

Posted on 3rd February, 2022


This is a short post by way of an update now that winter should have turned to spring.


It has been too cold and wet to feel the urge to move the van forward with some of the modifications we planned as a result of using it last year. One of my children bought us a more compact, more functional portable toilet for my birthday which has brought about a bit of a rethink on how best to use the space the old one has occupied.


It is one of those with a flush tank sitting above and connected to a sealed waste storage tank below. The increased space this offers above this loo begs to be used by building a storage unit to fill the space from behind the drivers seat to the end of the bed.


The potty might then be stored away below this unit when not in use and provides the opportunity to fit a miniature kitchen above it. We have no intention of making "the van" a mobile home. Setting up a camping style kitchen at the back as we did last year was cheap and easy to do but does have the disadvantage of having to cook outside. That includes simply boiling a kettle for a cup of tea and making cups of tea was by far it most common use last year.


There will be enough new space above the new loo for a "worktop" with a single gas burner and a small sink. We could then make a cup of tea without getting out of the van. Fitting this with a larger gas bottle would also save money and the inconvenience of having to find or carry spare gas. One 6kg bottle should give us around 30+ hours of tea making on a single 1.2kw ring.


There's little point in planning beyond this as an idea until I know the exact dimensions of the stove I need to build a storage unit / small kitchen for so I bought one by way of a test.


Love Amazon Prime. I found the one I have tested in this post for £38 including delivery. What's not to like about that? Depends on if it is fit for purpose or not and it is not.


OK. It clearly states on the description and packaging that it is "an outdoor LPG camping stove" so I was aware of this before it arrived. Neither the instruction or description tell one what type of jets are fitted but it is described as being suitable for use with Propane. I already had a hose and regulator for a propane gas torch so didn't need to buy that bit. I just removed the torch and connected it to a new 6kg propane bottle I bought for the purpose.


I'm glad I did a bench test as it is possibly not fitted with suitable jets. The stove was not easy to light. It partially lit a small section on one side of the burner but refused to light evenly around the whole burner plate without the flow of gas being increased. There was a VERY fine margin of adjustment between being partially alight and fully lit.


For any gas burner to be burning efficiently and safely it needs to be consistently burning with a blue flame. Any sign of a yellow flame is a bad sign.


Achieving this during the short test I gave the stove seemed impossible so I gave up and have sent the cooker back.


It may be cheap and it may be fine for "outdoor use" but it is not refined enough to be used safely in an enclosed space.


It may also work better with the propane gas I use if some adjustments were made to either the jet or the distribution plate. Perhaps it works well with Butane gas.


I will never know as I've now ordered a replacement which I'll also post a review on shortly.


Rather than spend the summer refining what "the van" now allows us to do. We are spending the summer making the most of what we've got. This also allows me to refine my thinking on what will work best for us. 


This never was going to be a full on conversion from an 8 seater Hyundai i800 people carrier into a full, off grid, live in mobile home. It needs to have multiple uses to justify the cost of having it. It would appear that a 2.5 litre diesel engined commercial vehicle is neither cheap to tax, insure or run. 


It was bought to replace an ageing Volvo V50 estate that I had bought as a "truck." Something to take junk to the tip and carry building materials to the my "house project" of the time. It's replacement "the van" needs to perform similar functions with the addtiion of being something we can use as a camper van or as a boot sale / out door fairs vehicle.


A people carrier it could be again, had I not thrown the original, heavy, six passenger seats away. I had no where to store them but I might fit a couple of removable, light weight seats from a mini bus in the future.


It does however fit the bill very neatly. It is fairly roomy, pulls like a train, should be reliable and unlike a van comes with windows and an interior that doesn't need to be added. We also discovered, when parked up for the night in a public car park on our last trip out. That it is not obvious that it is a camper van. The blinds work so well at blocking out the light that it was difficult to find the vehicle in the dark after a short walk before going to bed despite the interior lights having been left on inside. 


The vehicle comes with tinted windows as standard and so the blinds I've made are not obvious when fitted in place. This seems to enhance the potential for it to be regarded as a bit of a stealth camper. Particularly when parked up for the night.


The temporary Argos potty, fitted into an old wooden Ikea laundry box, works well sat behind the drivers seat. The top hinges up to provide access and is left up overnight. When closed, with a towel over the top, it acts as a table.

The loo and one single bed are on the same side. This makes access to the side door on that side "tight" to the point that it seems to be the best place to store rubbish and other miscellaneous items. 


We have a couple of small low folding camping tables I made years ago. One to cook at, the other to eat from. These are both 1200mm long and fit very neatly in the same place as the rubbish bag.


The biggest issue we still need to resolve is the slippery bed surface followed by buying a proper leisure battery rather than an old one from my previous vehicle.


Slippery Beds


The single beds are temporary but they still need to function reasonably well. Being made from some old shelves that happened to be the right size they are varnished. This makes them slippery. The solution will be to roughen them up somehow.


I've considered a few of the more obvious, matt paint, rough sanded finish, covering them in fabric but am going to cover them in the leather I removed from an old sofa that would otherwise be going to the tip. I recycled the rest of the material but held on to the leather.


The leather on the sofa turned out to be bi-cast and not the "real thing" we had been lead to believe it was when first purchased. This type of leather is leather that has been split from the back of the hide to make the front face thinner and more pliable / softer / easier to work with. This used to simply be thrown away as a waste product until someone had the bright idea of coating it in polyurethane and embossing it with a new leather like face.


It can therefore be sold as genuine leather. It smells like leather, feels like leather and to anyone not then told what it really is, appears to be full leather. The sales people tell you that it is 100% leather with a protective coat rather than the truth.


This "coated leather" requires special care to maintain it in good condition including not placing it in direct sunlight as this breaks down the PU coating making it sticky to the touch. The natural oils we all release from our skin including sweat also break down the PU coating so that over time, unless regularly cleaned or recoated it turns into something akin to a sticky fly trap. We bought three of these around 15 years ago believing that we were buying a leather suite that would last us for a lifetime. BUYER BEWARE!


I kept the leather because the reverse side of it is untreated with a suede like finish that I thought might have another use at some point. I would appear that this might be that time. Once I find the time to cut the pieces and stick them onto the existing shelves.


The need for a better battery.


The little red blue and yellow 12V cool box seen in the video still works well at keeping the milk and other chilled foods from going off. It was originally bought from Lidl. One of their, middle of the store, special buy offers.


It must be at least 15 or more years old. There is clearly a benefit in things being kept as simple as it is if it still performs as well now as the day it was bought. It seems to be no more than a cool box with a 12V fan driven heat exchanger built into the lid. It works at its best if freezer blocks are used in the base but even without these it will draw the inside temperature down to a good few degree below the ambient of the day.


Leave it running all night and it pulls the temperature inside it down to something noticeably chilled. The down side is that it will drain your car battery if the engine is not running which is why I currently have it connected to an old 90Ah battery I kept after replacing it on a previous vehicle. A Volvo V50 that needed a big punch to start it in the winter.


So a leisure battery with all the rest of the tech needed to recharge it both from the engine and a solar panel will be another future investment. I'm still doing the research. The options seem huge depending on what your anticipated power needs will be. 


I have no intention of going over the top on this but know that we will want to take off for a couple of weeks without worrying about having to recharge a battery which may only be used to recharge a few small devices and our cool box.


Do we need an awning?


There would be an advantage to the use of the Hyundai as a camper van if we were to add a covered area immediately beside or behind the vehicle. There are any number of solutions already on the market from awnings to drive away tents. None of these really suite our needs. 


We already have a large tent that can be connected via a porch like awning for when we are on a long stay at a camp site.


What we need is something that can be put up and taken down in minutes, that doesn't need to be pegged and which allows one to stand up to get changed or dressed in the dry.


Something that attaches over the rear door seems the favoured option I am exploring.


For the moment we just want to get some use from what has been done to date. 


It would be daft to spend all of ones time creating the perfect camper van, only to find that something happens, resulting in one never getting any fun from it.


This video needed a sound track and given the subject matter "The Surfer" Guinness advertisement from 1998 came to mind. It is all about the pleasure on being in the surf regardless of either how skilled one is or how big the surf is. It was just great fun, as it always is. 


Despite me being someone who would always avoid a "good enough" builder, plumber or any other skilled tradesman. There are occasions when being good enough is justified. That variation to the rule would apply to anything that is being trialed or tested before making something better that becomes the final product. That way one spends as little as possible on ideas that don't work as well as imagined in practice. 


Fitting the basic essentials for a comfortable "away from home" living environment is subject to many small variations on what it is possible to do. Getting the combination right is dictated by the type of vehicle one is adapting, the use or uses one has planned for it and you. You being it's often not you but you and a partner whose needs may differ from yours. 


Having proven that the basic layout I have quickly knocked-up works for us. I really don't want to spend the rest of the summer improving on it. This can wait until the winter. So I took one of my children off with me because he needed the break, I needed the surf and my wife needed to tend her allotment over the weekend. 


There was a gale blowing in from the South West the latter park of the previous week and the forecast predicted that it would be both wet and windy. That really doesn't matter too much when one is immersed in water anyway and the sea around the UK is warm this time of year. 


The "wetness" only becomes a potential issue when one gets out of the water in that it makes it more difficult to get warm and dry. 


The beauty of having a camper-van is in being able to get in, close the doors and change in the dry. 


Being able to make a hot drink or use a loo where one is parked is a HUGE benefit when it comes to measuring comfort levels while engaging in any out door pursuit. 


We really only went away for half a day and a half an one night, but it was great fun and well worth repeating.


Regularly getting a good night’s sleep appears to have grown in importance with age.


My immune system takes offence when that routine is interrupted. It abuses me with outbreaks of mouth ulcers or cold sores when I’ve gone too far. A restful nights sleep is therefore a must. Using single beds make that more likely. I’ve always been an earlier riser than my wife. Having individual access will reduce any potential disturbance for each of us.


Explorations on paper and card have shown that it’s possible within the space. How it’s done depends on how flexible, multifunctional, sophisticated or the cost I’m willing to invest in.


First things first. How big a bed does one actually need? 


Sleeping off the ground is the goal. It needs to be done without falling off the bed while turning over in the night. Having the beds too close would make any separation meaningless. We each want to be able to get up and out of bed without wakening the other. Having a gap big enough for this within the usable width of the vehicle needed to be proven quickly and cheaply.


I’d confess to being a bit of a hoarder. I had a couple of 18mm structural plywood shelves from an old office furniture solution I had in storage. They happen to be 500mm wide by 1830mm long. Ideal. The shelves had previously been stiffened below with softwood battens that I could use as legs for this test.


These beds were only going to be a temporary thing, so I didn’t invest too much time in how they were made. I used a multipack of basic 50mm hinges and a pack of small right angle brackets from ToolsStation to quickly knock something up.


I have been using “the van,” as it has now become, as such by placing a full 4ft by 8ft sheet ( 1220 x 2450 ) of plywood on the floor. It sits neatly between the wheel arch inners and the back of the front seat runners with a very small gap to the back door lip.


All I needed to do was fix each of the now six legged shelves to this plywood floor to create a usable set of sleeping platforms.


I was honestly surprised at how well these quick test beds fitted the space. I made them the same height as the small folding camping stools I’ve had for some years. Being around 350mm high, they seem to match other camper van storage /seat heights. 


This is a plus, because the seats / beds will work with the camping stuff I already have. I made a couple of folding things for our very first “people carrier.” A Japanese grey import Toyota Lucida. There are still a few of these around. Probably more so than their larger USA / European version of the same style, the Toyota Previa. ( More Details at the end.)


One thing became immediate clear as soon as they were fitted in place. They proved they would work within the space and that there was enough room on each to sleep as they were without adding to their width. The portable potty also had enough room to be placed as planned.


My wife and I tested lying on these benches while imagining they were beds. The space between of around 200mm provides acceptable access without feeling that we might fall off while lying on our backs or turning over. Sufficiently so that I bought a 500mm wide by 75mm deep self inflating mattress for each on Amazon. 


The potty now just needs to be housed in its own box. More importantly, having settled on a bed width of 500mm ( neither of us are large ) we needed to use it to test how the rest of the space worked.


We have just come back from that first trip to Bideford and Westward Ho earlier this week. 


I’ve attached some photographs of that trip but I’ll write about it in my next post. 


It brought to light the need for a few modifications but It was a really good couple of days out.


Addendum:


The Toyota Lucida and Toyota  Estima models were cheap second hand alternatives to other people carriers like the Ford Galaxy or the Previa. Japan had introduced legislation to reduce vehicle emissions in 2000 forcing the early disposal of non compliant vehicles when it took effect. 


The UK, with its less restrictive emission requirements also drove on the left side of the road. This helped fuel their import as they only needed a new age-related registration number from the DVLC to extend their use over here. 


Those that survive do so on second hand parts. The factory that built them and which provided some spare parts was consumed by a fire in 2020.


Originally manufactured for the Asian and Far Eastern markets they were relatively small compared to their Western equivalents. Their narrower wheel base relative to their height could and did cause them to flip onto their sides in the right conditions. Ask my kids about how that felt. Two of them were in the back being driven to school when I rolled it onto its roof on black ice one February morning in 2009.


It was a great little vehicle for the money and took five of us away camping in Devon and Cornwall for a good number of years.


I said I was a bit of a hoarder. The table I made to use with the Lucida on wet days, together with a smaller one of similar design, have a few more years use ahead of them.


It's one thing to want to get on with something you know that you'll enjoy. Finding the time to do it is something else.


My wife Rachel makes things from recycled fabric and decided that to take a market stall at Bideford in North Devon on a Tuesday in July to sell them. Rather than make the trip on her own we turned it into a mid week away opportunity to test the basic functionality of the van.


It's one thing to plan and mock things up in advance to reduce the risk of getting it wrong but you need to then prove your theories through action. I had a few concerns about the width of the beds only being 500mm but, being smallish people, it worked out fine. 


The best things about the trip were A) finding Westacotte Farm camp site and B) discovering that we have been driving past Westward Ho for the last 30 years completely unaware of how nice parts of it are. The FREE car parking beside the Costal Path is a real plus. We will make more and better use of it in the future.


Ready for bed


Costal Path near Westward Ho looking towards Hartland Point


Parked in the shade by the river in Bideford


Parked up at Westacott Farm Campsite


SUNSET OVER LUNDY ISLAND


The focus for now is to improve on what has already been made and show you what has changed in the next video.


Exploring your ideas in cardboard before you start buying or cutting up potentially expensive materials is well worth doing when developing something new. 


Planning things out on paper first is a must but, even producing a full set of drawings on computer, never really provides you with a true "feel" of how they will work in practice. 


Mocking things up in card and sticky tape will help you get a better handle on the scale, functionality and practicalities of these and how they will relate to each other when the work is finished. 


It is a significantly cheaper and quicker way to prove your big ideas rather jumping straight in cutting up wood or fabricating steel.


The biggest physical restraint in any vehicle conversion is the width followed by the height and finally the length of the space you have to work with. I opted for the Hyundai i800 based on all of these considerations measured against the cost of acquisition. 


Being a van based commercial people carrier it is BIG. Dimensioned at 1.92M wide, 5.12M long and 1.3M high on the outside, it’s fairly roomy inside. 


The uncluttered space from behind the driver and passenger seat slides to the rear up and over is 2.55M by 1.45 ( narrowing to 1.2M between the wheel arches at floor level ) and 1.35M from floor to the head lining.


Enough room to have a bed or two with storage below and still have floor space for a night loo / undressing area immediately behind the front seats.


Physically modelling things with card in the van highlighted the opportunity for a vertical store cupboard just inside the side door behind the passenger seat. This could store things one regularly needs without needing to get into the van to reach. Wet coats, walking boots, day bag kind of stuff. 


Having a facility just inside the side door to hang / store wet things also seems to make good sense if I can make it all fit.


The focus for now is on the main things we want to have which directed our decision to buy a van for camping in rather than a tent. Two single beds lifted off the ground, somewhere to sit and relax in the dry. A potty for those “caught short moments” at night and the privacy to use the van anywhere.


Everything else will be a plus to our original wish-list.


And so it is done. ( The Curtains Saga That is. ) 


However, I’m unlikely to win the Great British Sewing Bee, or any other sewing competition for the finish.


I'm pleased with the final look of my Hyundai i800 Cabin Privacy Screen / Curtain. It has taken an age to make. 


The full width privacy curtain between the “cab” and the “van” was the last problem to be resolved. 


Again, my first thought was to keep things as simple as possible as dictated by the location. I planned on using a straight, horizontal, curtain track to span the entire width of the van behind the seats. This would have resulted in there being a gap between the top of the rail and the underside of the head lining. It was a compromise. Head room is limited and the plan would reduce this but would result in a simple straight curtain and be easier to fit.


The un-curtained void above the rail could be then be filled with a fixed valance. I set about making a template for this valance and the curtain track, but bumping my head on this template made me see that simple as it seemed on paper, it was not going to work.


It took a while to find a curtain rail section that would work but highly recommend the one I did finally discover. The rail needed to be small enough to be unobtrusive and light enough to be easily deformed to match the curved shapes of the head lining.


Making a black-out curtain with a lining on the reverse to match the colour of the other curtains was something new to me. The two material I had to hand were quite different from one another with differing sewable characteristics.


Added to this was the complex shape of the supporting curtain rail which needed to be matched in the top curtain hem if it was to hang neatly when closed across the gap.


The end result of almost three days work on both the rail and the curtain do seem to have been worth the effort. 


Given the shape of the space to be closed off, I now can’t imagine doing it any other way.


The video attached to this blog page describes both the problem and the solution much better that words, my sketch drawings or words ever can.


The curtain saga is therefore at an end for now though a few things like tie-backs and some telco pads to hold it against the inner sides of the van still need to be finished.


I can move on to the more exciting stuff like how to fit a flexible sleeping, storage and living solution.


Next up. “Why two beds?”

Hyundai i800 Curtains Fit and Review

Posted on 10th June, 2021


Making curtains for your Hyundai i800 camper-van is not the most exciting subject for a blog. 


It’s just one of those things one will need to do if you plan to get some privacy inside the vehicle. Particularly with the light on, no matter where you happen to find yourself parked for the night.


Having first explored some methods on paper. I opted to use furniture foam as a quick seemingly simple, solution. It suits the deep side window detail of the van and made use of some materials I had to hand.


It turned out not to be particularly cheap as high density furniture foam is quite expensive. It also took a lot of sewing to complete but they do seem to work.


I had planned to use curtain wire at the back of the van as the rear door curves out from the sides with a curved kidney bean shaped window.


The curtain I first made had a deep hem top and bottom both above and below the wire supports. This was to allow the curtain to cover the whole window within the limits created by the shape the door. It didn’t work. The tension I had put into the curtain in an attempt to keep it taut made it impossible to slide them back and forth. 


Rather than waste the black-out material I had already cut I reused it to make two more foam cushions. I have then fixed each of these to the metal window surround using self adhesive and sewn velcro pads. This works for now.


The full width privacy curtain between the “cab” and the “van” was the last problem to be resolved. 


It is proving to be just as challenging to make as the other window covers but I do have a tendency to make life difficult for myself in that respect by not being prepared to accept something that is less than fit for purpose.


I initially spent some time exploring “the simplest option” which was to use a straight curtain rail ( mainly because I couldn’t find one that I was going to be able to bend ) and  accept that there would be an open gap above this that I might fill in with a soffit of some sort.


That didn’t work. I only needed to bang my head twice on the underside of the mock-up to realise it was a non starter.


Watch the next blog video to find out just how much extra work that decision involved.